Showing posts with label gardening. Show all posts

Wednesday, February 7, 2018

Big Dig for Change

My mind and my garden have been chaotic with more than just the usual summer challenges of watering, possums, rats and other wee beasties. Repairs to the septic system have been in process....the excavating to take place between a wall and a raised garden bed with a total width of 2 metres to maneuver.

Gardens were dug out, climbing roses pruned to within an inch of their lives to allow the side boundary fence to be taken down for access through the thankfully empty neighbouring block, fences, gates, paving, pots and plants needed dealing with. Everyone close was warned and asked to shut their doors and windows  and not hang out washing for the day.

My anxiety levels rocketed as the garden was dismantled with me wearing the hats of planner, site manager, gardener, accounts person and the tea lady. Plants ten years old and more were sacrificed, others pruned to within an inch of their lives. Fences and gates lovingly painted only months ago were taken down, some damaged beyond repair.

The night before the excavator was due, I stood in the garden at dusk, looking at what we had done and instead of sadness at the destruction of years of hard work, I felt a feeling of space, boundaries coming down. An opening up of new possibilities  - room for the new and a frisson of excitement for the possibilities of change.

It's a week on,there is paving to be relaid, gates and fences to be rebuilt. A massive pile of prunings, old irrigation and the carpet that was laid to kill the kikuyu grass 17 years ago are piled on the road verge. An unexpected couple of cubic metres of clay dug from the hole will be a bonus in the sandy garden soils and there is the buzz of planning new garden beds. There is relief that the destruction phase is over and rebuilding can take its time. The stress of the costs involved, dealing with various tradesmen, excavating power and phone lines, keeping  the mess and confusion to manageable levels have faded. The fears and the uncertainty of dealing with what was, for me, a huge project have blossomed into a new confidence in my abilities. By asking questions, treating others with respect and trusting their judgement, taking care to keep the workers safe and fed, everything progressed smoothly and with good humour. Well done all of us!


Saturday, January 30, 2016

Tropical glow without the juicer

The turmeric is halfway through its growth cycle at the moment. There is no sign yet of the creamy white fragrant flowers. It will be the end of summer, if not autumn, before the tops start to die back and a few weeks more till harvest. This is my third year growing turmeric. I am still amazed it is still alive after our cool wet winters.

It was originally planted in a pot of good quality potting mix enhanced with various manures and mulched with lupin hay. Being in a pot makes it easier to shift its position if the weather gets too cold. Last year I placed them in the shade of the north facing fence which here, means it is warmed all day by the sun. This year they are again north facing but under shade cloth against the rendered brick walls of the raised beds where I can keep an eye on them from the kitchen window.
The first year I left it be in its pot. That meant that much of the root in the centre of the pot had become sodden and too rotten to harvest. Still, there was over a kilo of fresh root in that pot, plenty to play with.

If you wish to dry your turmeric, it is best done soon after harvest. After washing, finely slice the roots into equal thicknesses, not bothering to peel them. Lay them on racks, evenly spaced. You can dehydrate in your food dryer, I simply left them in the house on the dryer racks and they were dry within a week. You can store in an airtight jar and grind as needed or grind the whole lot into a powder ready for cooking.

Homemade turmeric powder may not seem as brightly coloured as commercial powder. This depends on many factors, including the fact that imported turmeric is irradiated when passing through customs which strangely enhances the colour. The taste and the aroma of home grown are infinitely superior in my experience. This crop from one pot will last me for cooking until the next is ready.
Turmeric is much in favour at the moment as a gentle anti-inflammatory due to its active compound, curcumin, which gives it the lovely yellow colour. The United States National Library of Medicine’s database, Medline, a bibliographic data base, shows over 600 potential health benefits. However, curcumin does not become active until it is a) heated, b) eaten with black pepper to increase its bioavailability and c) adding ghee, coconut or olive oil when cooking. So, stop juicing it right now and start frying it gently and adding it to your meals. Otherwise you will have a very low absorption rate and waste all those precious attributes.

 It is all very easy… Look to traditional Indian recipes, they all follow these principles: curry powder always contains pepper and all curry pastes are gently fried before adding other ingredients.


Friday, February 20, 2015

Nothin mousey about him!!


Every spring I rustle around in my seed collection to plan the summer vegetable patch.  In the cupboard I came across an envelope that Lyn, an avid seed saver, had given me last autumn."Mouse Melon" said the label. Visions of a melon, just perfect for one or two serves, that didn't need a lot of space to grow, swam into my imagination.

The tiny little plants that came up looked very much like baby Black Eyed Susan and soon sent out tendrils to grasp the trellis. When it reached a metre high, no flowers in sight and began  rampaging through a neighbouring rosebush I thought it was time to find out more.


Dear little thing turned out to be a cucumber designed as a watermelon. Native to Mexico and Central America,its Latin name is Melothria scabra. Iwas reassured to find they were'slow to start'

then read on that they can 'often reach ten feet. In the UK they grow them indoors.
They are waterwise and drought tolerant. I can vouch for that as the old barrels are notorious for drying out. Now, at the end of summer, it is looking a bit raggedy but still producing and doing no harm to the Rose it is hanging over. It really is a darling little plant, its 'cucmelons' hang like lanterns and totally foil the parrots, who have never seen anything like it before.


The skin is slightly lemony and gets a bit tough if left unpicked for too long. They are wonderful in salads and as a garnish and apparently pickle as well as their larger cousins. I haven't managed to keep enough to pickle yet, too busy playing 'show and tell' everywhere I visit.


It really is a darling little plant. I will be saving seed if you folks in Western Australia would like some, send a stamped, self addressed envelope to me at PO Box 353, Margaret River and I will send you some.


Happy Gardening,


nirala


Thursday, March 15, 2012

Tie up your tights

My father banned me from wearing stockings when I was a teenager. The poor man had seen far too many lumpy white legs bulging in his time, thought the idea of his young daughter in a suspender belt was far too much for him. Thank goodness that in the late sixties we saw the first stay up stockings, then came the revolution of panty hose.
Once we used to darn our stockings and glue them to our legs with nail polish when they laddered, now tights are so cheap to buy (and so much easier to wear) they have almost become a throw away item. It can get cold here and the extra warmth a pair of tights can give is often necessary.  At the beginning of each winter, I am thrilled when it turns out my drawer has pairs of cobwebbed with snags, sags, holes and runs.

It's exciting as a retired pair of tights is a great resource that can stretch to a long list of uses!


TOES 
KIDS
Classic use is to create ‘grass heads’ for children to grow.
To do this, cut the foot plus about 10 cm from the leg of the tights.
Place 1 tablespoon off grass seed in the toe and cover with cup of potting mix or sand.
Tie the open end into a knot that sits up tight to the filling.
Roll in your hands until round or oval in shape.
Add stick on or embroidered eyes at this stage if you like.
Fill a cup or glass with water and sit the head in it, so it rests on the rim while the tail hangs in the water.
Keep moist and watch grow.
BIRDS
I have experimented with filling these completely with wheat. In the hope I could hang them in the chicken pen for green feed. It didn’t work...the tights are too fine for the hearty wheat shoots and they get very congested.  Worth trying again with smaller seeds though.
FRUIT
Toe bags are useful to protect individual fruits from bird attack
They will simply slide over the larger fruits and their elasticity will hold them in place.To protect smaller fruit tie gently above the stem to secure.
You can also tie paper bags with thin ties. After all, you only get two feet per pair!

LEGS
My fave!
Begin by cutting the legs off the pant. Leave enough leg attached to tie a knot in.
Cut across the legs in 2 cm strips create a collection of useful rubber band type thingies that you can use to tie up your hair.
Cutting them into strips makes the most excellent garden ties. They will stretch for miles and are very gentle on the stems of plants. They are strong and durable and will survive a whole summer of intense heat before they lose their elasticity. Best of all, thgey stay put if you tie them in a bow so you can remove them easily!
If you need longer and wider strips for heavier jobs, cut each leg down the sides into two pieces.

PANTS
HANGING BASKET LINERS
Tie a knot at each leg hole.
Stretch the waistband over the sides of the basket. Pin in place with pegs while filling with potting mix, remove after adding your plants.
STAGHORN FERNS
Again, tie off the leg holes.
Slip the tights over a plank that is cut to the size of the backing board you require that has a predrilled hole in it for hanging.
Pull the pants up from the bottom over the timber.
While flat fill firmly with damp peat moss or sphagnum moss.
Tuck the fern pup into the waist line, leaving the shoots free, and tie with a long leg tie to secure if needed.
I also have a very nice clump of Spanish Moss (tillandsia usneoides) that has been growing nicely tucked into one of these ‘bags’ for two or three years.

ALL PARTS
Absolutely essential for making scarecrows
The pant tops make great heads if you don’t want to use tights for the rest...you can leave the legs on and create pony tails or twist them up into little topknots.
Take three pairs of tights.
Head
Cut the legs from one pair and tie off the pant legs to make a sack.
Stuff with straw and insert a broom handle or long stake.
Tie off the excess to secure tightly to the stick or wind around with gaffer tape. 
Body: Take the other two pairs.
Stuff fairly firmly with straw, including the legs.
One pair will be top of body and arms, the other will be hips and legs.
Tie knots at the ends of the ‘arms’ to shorten. You can knot again if you wish to create hands as well, remember to push some straw down so they are not ‘empty.’
Lay your body pieces on the ground and tuck one into the other to form the waist.
With a sacking needle and string or a bodkin with wool, sew together around the middle, rolling him over as you go. 
Dress your scarecrow .
Fix a crossbeam just below the head to support the arms then secure your scarecrow to his support.
If you would like him or her to pose on a chair or perch in a tree, cut the centre pole to the length of the body before dressing.


Thursday, March 17, 2011

Autumn invasion

We are in the second week of autumn, the mornings have an edge of change and days are appreciatively shorter. No rain though and the garden is looking very sad. Most of the summer veg are over and the beds lie empty under their straw blankets. Comparatively lush compared to the surrounding bush, we have become a magnet for creatures looking for food and water.
A plague of rats and mice, ants and fleas has been followed by grasshoppers of all shapes and sizes and twenty eight spot ladybirds (henosepilachna spp.) One eating the snow peas (optimistically planted under shade), the other shredding the leaves of the eggplants.
A deadly night shade had been acting as my trap plant for the ladybirds. It had got to the stage where it was almost lace.  When I went to pull it out I discovered a bug I had never seen before. Very sinister, looking like a cross between a giant mealy bug and a bright yellow slater. I waded through page after page of nightmares trying to identify it. Creatures that could eat, saw, cut nibble and suck the very life from your garden and only be controlled by toxic chemicals.
After some careful reading, I came across the answer...these little devils were the larval stage of the pesky 28 spot lady birds. Clustered on the base of the stem, they were biding their time to begin to head leaf ward as ladybirds. Another little mystery solved and another little snack for the chickens.


See more about natural pest control here.  

Wednesday, January 26, 2011

The dogs a glutton

The last few apricots are sitting on the shelf in the kitchen. Just when you think you can’t bear the sight of any more, they are finished. I have had to put these up a shelf. Lady, our dacshund, has taken to helping herself and has been leaving kernels and under ripe or bruised fruit all over the house. Of course she will only eat (and chase) the perfectly ripe ones. Now we are down to the final couple of kilos, they suddenly become precious – soft furry concentrated sunshine, picked warm from the tree, with juices dripping - so sensual .
We have had a bumper crop of stone fruit thanks to a cold snap and the lack of hail during spring. I have tried to be sensible about managing the apricot tree this year. It was radically pruned last year but a diet of soy whey, its position is next to the compost heap and above the septic tank has  will ensured this tree will tower over the shed roof again!
The accessible parts of the apricot were thinned after fruit set and one large lower branch netted so the fruit could sun ripen for eating. The ring necked parrots helped thin the upper branches, preventing any limb damage.
I picked most of the crop just as they began to change colour then laid them in single layers on trays and in baskets to ripen further. (That’s why Lady could reach them – the kitchen looked like a fruit shop for a couple of weeks.) Each day I checked them for marks and processed a few kilos.
I have frozen most of them, lightly stewing them first. I am not fond of dried apricots and have become realistic (finally!) about how much apricot jam the family can eat. I did make one batch and can always make more from the frozen fruit later if I choose.
Lady was quite annoyed all day yesterday without her fruit snacks. Today she was smug. On the rug we found a partially chewed under ripe Satsuma plum. Another plum lay in a purple pool under the table. They are obviously not ripe yet!

Monday, October 4, 2010

Spring is a time for romance - a melodrama of plants


Asparagus makes suggestive gestures at her as she drifts draped in a gown of palest daffy down dilly through the spring garden. Past where the love in a mist waves its feathery fronds above the forget me nots. Past cherry pie, sweet peas and Chinese lanterns hinting of romantic dinners. On past the shaded glade where the music of bluebells accompanies the poetry of Chaucer, to the seat under the plum tree.
Her violet eyes narrow under her hazel hair, her red budded mouth purses as she wonders  ‘Will I meet the golden Graeme Thomas tonight or am I doomed to dance with the elder Mr Lincoln?

Just a flight of fancy from me today, messing about trying to get as many of my plant names as I could into a paragraph!

Monday, September 20, 2010

Bees, bluebells and blossom


freesias

geranium


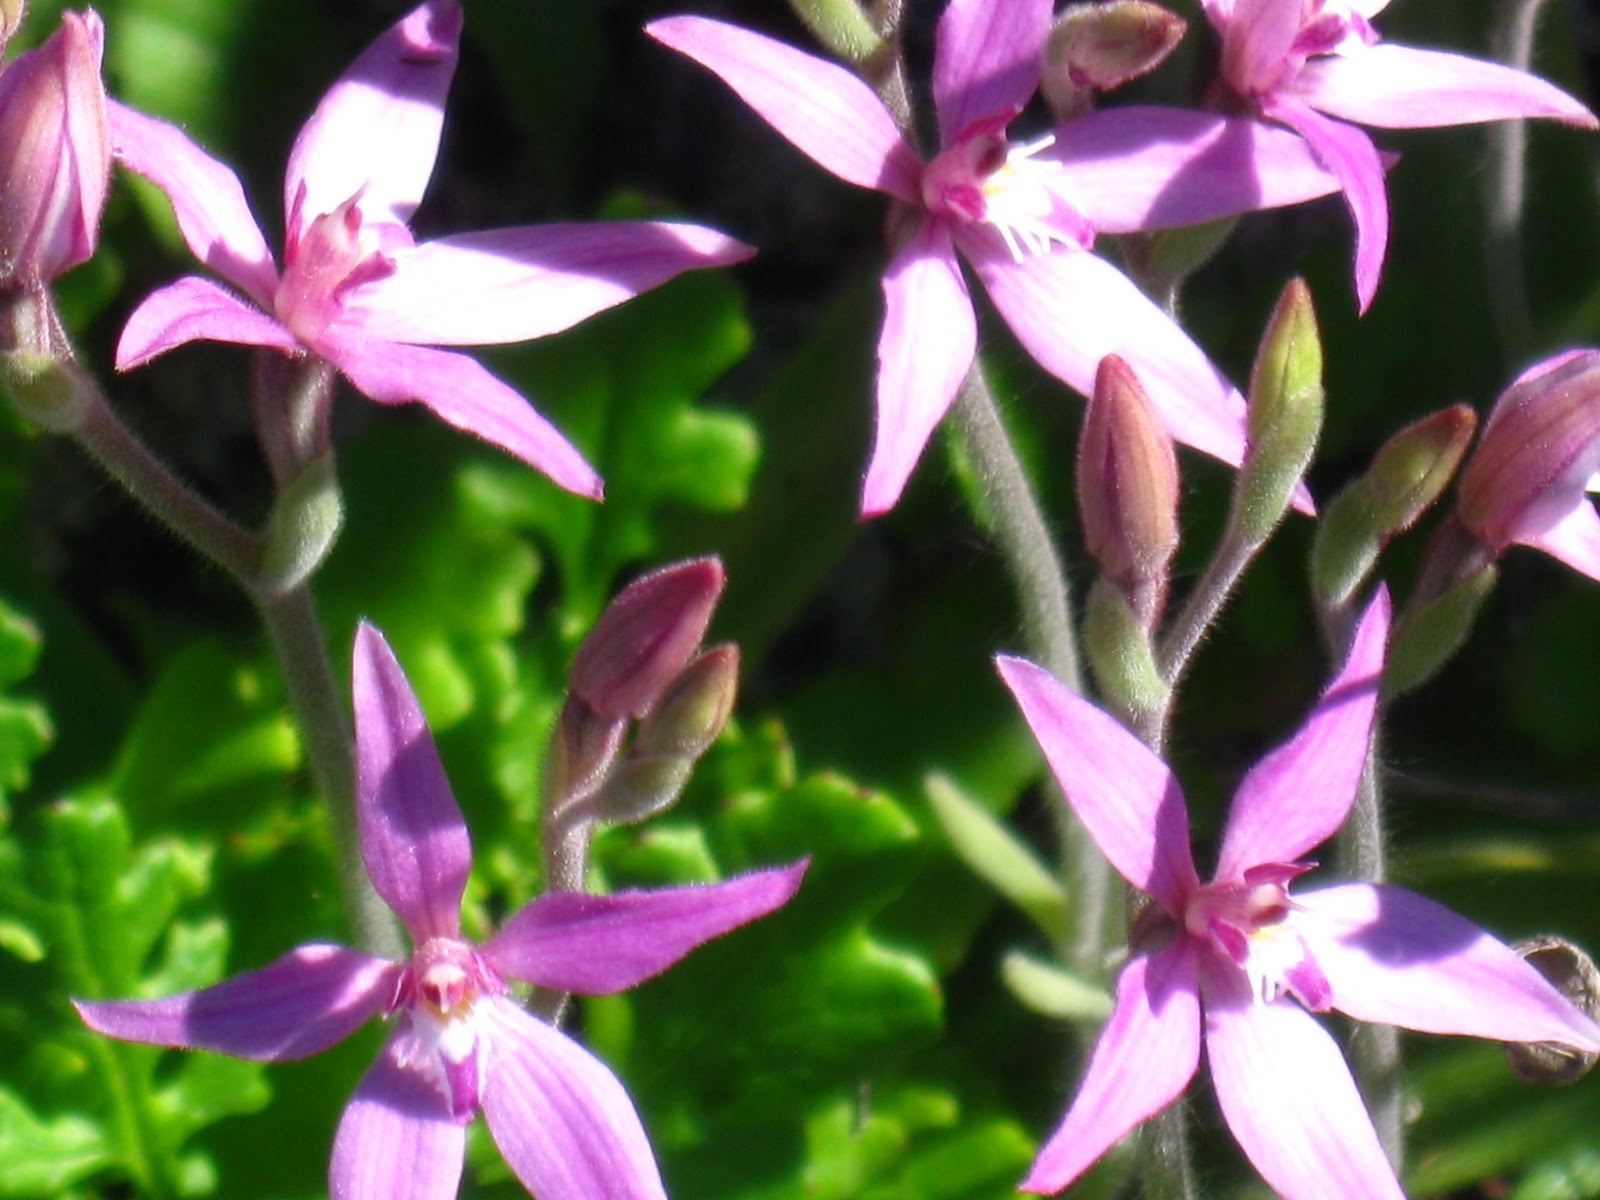
The first warm days of spring have bought out the blossom on the fruit trees, the bluebells and Dutch  iris. The jasmine and honeysuckle sent out pungent puffs of perfume as the sun tops the trees. The bees busy everywhere. The roses are suddenly thick with new red leaves and tiny green figs are visible as the first leaves unfurl on the fig tree. Walking at the beach this morning we found a patch of fairy orchids only metres from the ocean, their faces all turned to the east.

bluebells

This  quickening of life calls me into the garden.
So until the next rainy day, here’s  some photos.

Enjoy,

Fairy orchids
nirala

protea


spikenard

fig


Wednesday, April 28, 2010

Living with wildlife

With the rain come the pests. Baby snails are hiding under the soft baby leaves and the the larger snails are doing rude things on the footpath early in the morning. The parrots are fighting over the olives, the last of the figs and the ripening apples. It’s obviously a time to revamp my defences.
Snails
The first line of defence for snails has always been picking off by hand. This is fine if you have time or grandchildren you can pay per snail collected. They are then fed to the chickens, who adore them. Don’t be tempted to tread on them as it is said that their eggs will survive if they are squashed on a damp surface. This could be an old wives tale.
Two years ago I made snail ‘peppers’, a witchy Bio Dynamic preparation involving snail cremation, the grinding of ash and the making of a homeopathic tincture when the planets were in certain positions. I won’t go into here, contact your local BD Society for precise explanations. I will say that in a year when the snails had reached plague proportions (I had been ‘picking’ up around fifty every day) it made a stunning impact. After spraying twice, the snail numbers reduced dramatically and haven’t been seen in huge numbers since. It is really worth the effort.
The easiest, most time efficient and safe way I have found to control them is with bird and pet safe snail pellets. These contain a small amount of iron chelate which the snails ingest. It binds them up and they die of constipation. As the amount is very small, other creatures are not affected.  Scatter about two pellets per square metre, in the evening. They seem to work best on damp soil but dissolve in the rain. Two or three applications should keep them under control. You need to store these in a tin as rats and mice love them. I tried a glass jar but they soon discovered that a jar can be pushed off a shelf and smashed. I have to lock my dogs away when spreading these as they will seek them out and eat them one by one.

Parrots
Twenty eights are the main hassle here, they will taste and try everything in the garden from green olives to under ripe almonds and rose buds. If they don’t like the taste, they simply throw it away and try another one, just in case it tastes different. I am sure they destroy some plants just for fun.
The only way to totally keep them at bay is to net everything. I don’t use nets as they are impractical in a small garden. The last time I netted a tree a caught a snake, which died and a hawk, which I had to rescue with the help of a strong man wearing leather gloves.
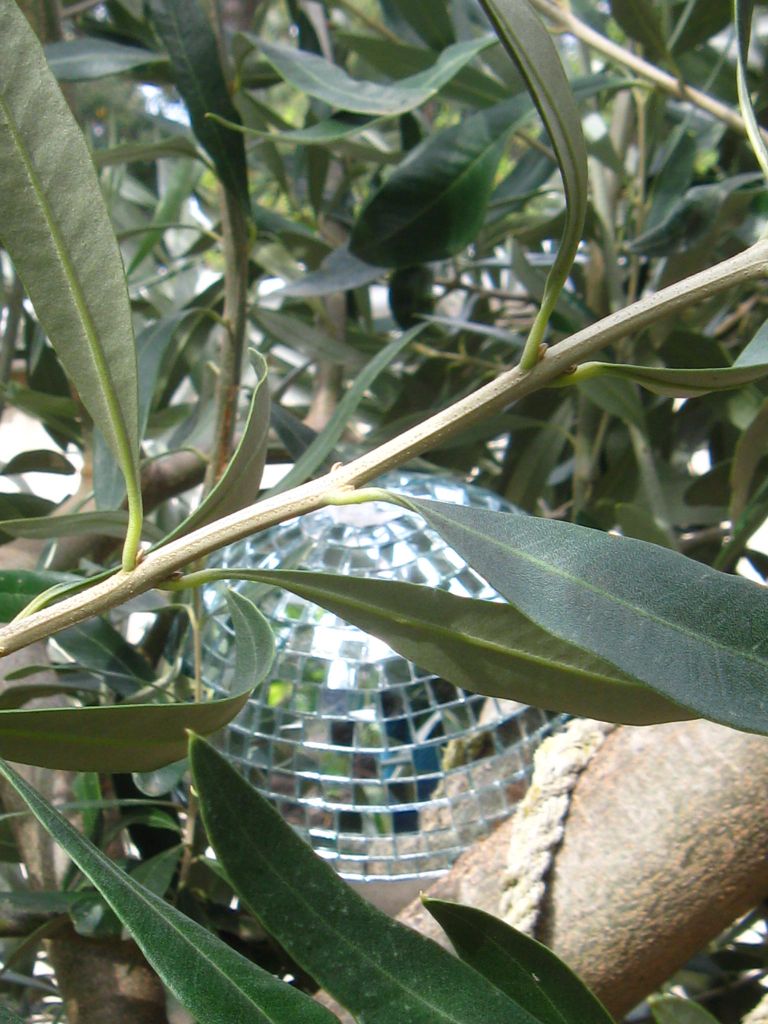
These cheeky vandals are fearless.  Nothing works for long, so the plan here is to change methods all the time.  In the olive tree, I have a disco ball and a swinging CD and the fig has a shiny set of wind chimes. Last year I had plastic shopping bags rustling in the branches but as these are not environmentally friendly,I try not to use them. Christmas tinsel, owls on sticks with glass eyes, balloons, hawk kites, dogs trained to see the parrots off - I tried them all at different times. The new addition to my arsenal is Mr Scary, made by my grandson, Christopher. He’s been out there a couple of weeks now and the parrots haven’t been seen landing on him – yet! He certainly scares me when I pass him at night!
It is possible to protect some fruit by bagging. I use paper bags tied with string as they are biodegradable. You can mad bags that last with net curtains or shade cloth. Plant clips or pegs can be used to close them. If the weather becomes wet, check for mould and mildew on your fruit, especially grapes.
You can get one step ahead of the parrots with fruit that will ripen off the tree, like quinces, by picking them when the first parrot damage appears.

Tree house
Dwarf and young trees can be protected by sewing a cube of shade cloth with one side left open. Measure the height of your tree, adding 15 cm to allow a little room and cut 5 squares of shade cloth. Sew together with a bodkin or upholstery needle, threaded with string or nylon knitting yarn, using a simple running stitch.
Hammer four stakes in a square of the same size into the ground around your tree, carefully avoiding the roots. Slip the shade cloth over so the corners of the top rest on the top of the stakes. If the cloth doesn’t reach the ground, hammer the stakes in a little more. Weigh the bottom down with bricks or timber or peg with loops of fencing wire. This will keep rabbits out for a while too.
My worst strategy ever was to provide the birds with extra food. Every parrot for miles arrived to squabble and screech outside the window. They lost all fear of people, seeing them as a food source. As the feeder was next to the chicken pen, they soon noticed there was food to be had there too and began to steal wheat from there as well. With the black cockatoos flinging gum nuts to land like rocks on the tin roof on the other side of the house it was like starring in a Hitchcock movie.


The truth is, I can be a bit lax about controlling pests as I am rather fond of all the wildlife in my garden, even the twenty eights. The fact that they are here, with the beetles and praying mantis, the frogs, the blue tongues and the gecko's mean my garden is a safe haven for everyone. Before we build the front wall we used to have kangaroos visiting too The reality is that we grow more than we can ever eat, why shouldn’t they have their share too?

Monday, April 19, 2010

Growing green chickens

There is a lull in the garden at this time of year. As the summer breathes her last sigh, the beds are chaotic with lanky half dead tomatoes, basil going to seed and the last few brave flowers on the zucchini and capsicum. It seems there is little to eat at the moment but with the recent rains, my ‘chicken’ bed has sprouted madly. Two weeks ago I planted (if you can call banging seed heads together over the garden bed ‘planting’) the bed with coriander, mustard greens, rocket, parsley and Chinese spinach.

My chickens lead a penned life and so can’t forage for fresh greens. I try to address this by planting forage plants along the fences. They nibble on comfrey, red clover, silver beet and fennel. They get handfed other greens that grow wildly such as upland cress, nasturtium and dandelion and other useful ‘weeds.’

In summer when extra green feed is scarce I grow oat or wheatgrass in trays and in autumn fatten the roosters on sprouted lupins. The wheatgrass is grown from wheat soaked overnight then sown in seed trays in a commercial potting mix. When it reaches 10cm high, I put the tray into the pen and watch them graze. Before they begin to scratch and dig the seed out, I take it away. The wheatgrass will regrow in a few days. Two trays rotated allow ten chickens to graze every second day. I have a friend who grows his in half circle hanging baskets which he hangs on their fence, which prevents the scratch attack from happening.

To make the lupin sprouts, the lupins are soaked overnight and laid on kitchen paper which is kept moist until the first leaves are seen in 3 or 4 days. The sprouts are then vitamised with bran, bread scraps or stale biscuits. For some reason, they won’t eat them without putting them through the blender. Just too spoilt, I guess. Sprouting the lupins increases the protein content as well as giving them tasty greens.

I have just raided the chicken bed for our dinner, using the thinnings of mustard greens, coriander, baby nasturtium leaves and upland cress. They will make an ever so trendy green salad. In posh shops they are known as ‘micro herbs’ and command a massive price per kilo. They are not hard to grow so I guess it’s the fussy washing you pay for. The chickens won’t mind, they are all busy picking over the newly pulled sweet corn!
go well,
nirala


Thursday, November 5, 2009

And I will make thee beds of roses...

‘…my mouth fills at the memory of the perfume, like cream and marshmallow and burnt sugar and the heady mingling of cognac and fresh ground cocoa beans. It is the scent of a woman’s hair, just where the nape joins the skull’s tender hollow, the scent of ripe apricots in the sun…’

‘Chocolat’ by Joanne Harris


The garden at the moment is heady with such intense fragrance I can only close my eyes, breathe it in deeply and hope to place it in some part of memory where I can recall at will that ethereal, heady swooning sensation.
The fences are laden with pink jasmine and honeysuckle, Mr. Lincoln is sighing his rich redness into the air and the lemon tree is laden with absurd amounts of tart blossoms. The sweet almondy purple flowers of the cherry pie have wound their way into the lemon verbena like some rich dessert recipe. Custardy elderflowers and the fresh scent of lavender remind me of afternoon tea with elderly relatives, the musky scent of the poppies of forbidden pleasures.
Spring is a busy time, there is manure and hay to spread, summer vegetables to plant, bulbs to be dug. The window sill holds a growing collection of jars and bottles, oils and essences of petals and flowers and the dryer is full of lavender, roses and calendula, all in an attempt to capture the elusive nature of fragrance.
Unless you can grow acres of fragrant flowers, you won’t be able to create your own essential oils. It needs thousands of flowers to pass through the distillation process to produce a very small amount of oil. There is another process that can be done at home. It is a variation on the enfleurage method of extraction. There are a few different variations of this, each using oil or fat. I have found a good cheat’s method that will give you a nicely scented oil infusion.


Fill a jar with scented petals of your choice, a mixture of flowers can be lovely. Cover with grape seed or jojoba oil and add 2 teaspoons of vodka.Place on a sunny window sill or in a warm spot. Each day, strain the oil and replace the flowers with fresh ones. Check after ten days. If you would like a stronger scent, continue replacing the flowers each day. Finally, strain the oil through a piece of muslin into a dark glass bottle and store in a cool place out of the sun or refrigerate. Use in perfume blends, cosmetics or massage oil.

And I will make thee beds of roses
And a thousand fragrant posies…’
Christopher Marlowe

Wednesday, October 21, 2009

Show Day

The weather leapt into summer overnight, ignoring spring entirely. With two days until I was due to enter my produce in the local agricultural show it wasn’t the best time for extreme weather.
The day before it was already warm at 6.30 am when I discovered that the best stick of celery had begun to bolt overnight, the biggest red cabbage was looking a bit cooked and the coriander was now three foot tall and flowering and wouldn’t be any good for my display of culinary herbs. Thank goodness I only needed a minimum of six different herbs and had more vegetables to choose from. I bundled the second choices up and it all looked pretty good when I dropped it at the hall, primped, sprayed and hidden under a wet tea towel for the afternoon judging.
The day of the show was a scorcher. By noon all the fresh produce was limp, the milk had turned solid in its bottles and the iced cakes were looking sad. By four o’clock hot, tired show people and volunteers were beginning to pack up. Outside the office a long queue of people, wound across the grass. The happy, rowdy line up on the lawn was the final part of the show process. These people had acquired their show program as soon as it was available, studied the sections they wished to enter, visited the office the week before to register and pay an entry fee for each item they planned to enter, delivered their exhibits the day before and had just picked them up again. The pre planning in some cases had taken a whole year to produce the best blooms, most handsome chicken or best dressed pet. The red and blue cards they clutched as they waited showed that they were the successful ones, waiting in line to collect their winnings.
The people around me were a perfect microcosm of the day: teenagers from the photography class, retirees and their art works, young girls in jodhpurs, grannies with their preserves and men bantering about their veggies. Friends of many years, neighbours and complete strangers all waited patiently, dissecting the day and comparing prizes and how to spend them and congratulating each other in happy camaraderie.
As the line moved slowly in the hot afternoon sunshine I felt that to be with these people, in this community, was the real reward for our labour. And yes, I did win a couple of prizes – the cash will be used to buy vinegar to pickle all those cabbages!

Enjoy the weather,

nirala

Wednesday, July 29, 2009

Brightening Wash Day Blues

I know this idea has come up before, but with so many of us consigned to a 1/4 acre or less suburban block these days, ideas for turning small spaces into productive spaces are necessary when we want to turn our hand to being a little more self-sufficient.

It is amazing what can be achieved by using wasted spaces, such as beneath the clothesline.With the growth of apartment living, and the suburban backyard shrinking, a lot of people find they no longer can use a clothesline to dry their clothes, but for those of us who still have the rotary hoist in the back, that space beneath it can be made useful.

I remember reading how in the past "ladies of the house" would grow lavender bushes next to the clothesline for draping handkerchiefs and "smalls" over to impart a lovely fragrance while they dried. Apparently it was also planted where the bed sheets could brush against the lavender while they were on the line, giving them a natural insect repellence during storage.

Mark a line about 1.5 metres out from the clothesline pole, giving you a garden diameter of 3 metres. Remember to leave an opening to walk through to get to your line! You can plant the lavender any way you like - if the soil is easy enough to dig, go straight in! If it's rocky or hard, you may want to raise a bed. Place the plants just in from your marked line. Unless your area is damp and shady, you should be able to find a lavender to suit almost any climate.

Directly around the pole, you can also add another bed about 50 centimetres out from the pole all the way around, to give a smaller bed with a diameter of 1 metre. This is a neat little bed that can be reached over easily, and it can be used to plant any number of different plants; I've seen both sweet peas and climbing beans trained up a climbing frame around the pole, with nasturtiums planted beneath. My neighbour at my old place had cherry tomatoes, but I decided to plant rosemary in mine.

I didn't think I would ever miss a clothesline! There ought to be enough distance between the two beds to walk between, and to hang long things, which will still brush against the plants in a breeze.If you're allergic to bees, it may pay you to choose plants that are not quite so attractive to them, or you could prune your lavender hedge more regularly so that it doesn't come into flower, but you can still enjoy the fragrant foliage.

There's also no reason to stick to just lavender either. Many of the scented-leaf pelargonium are suited, and they come in such scents as lemon, lime, citronella, rose, cinnamon, nutmeg, apple and violet! Curry plant is also wonderfully scented (Helichrysum italicum). If your clothesline is shaded, why not try some mint? Suitably restrained of course.

Don't feel limited to the hedging idea, either. Some of the magnificent groundcover thymes would be fabulous.Place an old table or bench near your garden "entrance" to hold a basket of laundry, and a painted terracotta pot to hold the pegs. Hanging the wash isn't anyone favourite task, but if it's got to be done - which it has :P - why not make it as pleasant as possible?

You may even want to sit a while, once the job is done :
Kerry Monteith

Thank you so much for this article Kerry and if anyone creates a garden such as this one we'd really love a photo please.

Sunday, May 31, 2009

Break of Season!


Monday May 18th, I spent the day in the garden. It seemed appropriate as it was the day the moon was right for us to make our Bio Dynamic preparations. The weather had been lovely, warm and sunny. I took photos of our magnificent tree dahlia towering over Amita, who is over 6 foot. Its blooming usually heralds the first storms and we only get to appreciate the lovely petals scattered on the ground. For over a fortnight it had been spectacular.

As we began to stir, the clouds began to thicken. There was much discussion about how the 500 prep works better on damp soil and how it has been observed it often rains at just the right time. More garden magic at work! Enjoying the novelty of refreshing splats on our bare skin, it was a while before we sought shelter.

Over the next 3 days the rain increased until a big storm blew in, unusually, from the north and dumped over an inch of rain. The next morning we awoke to a cool, morning, the earth exhaling a huge welcoming sigh to mark the beginning of the rain, the plants glistening proud and upright, dust-free.There weren't any pink petals scattered on the ground, the dahlia had snapped off near the ground and fallen into the neighbours garden. Ugly broken stumps remained.

We will miss the dahlia flowers as much as we welcome the rain. We are heading towards the winter solstice, a good time to shed the old and embrace the new, knowing we are travelling back into the light. In the week since, the bromeliads have begun to flower and the spring bulbs have to poke their heads up, we have trimmed the tree dahlia, she'll be back - just like the sun!.

Sunday, March 15, 2009

Is That a Potato?


I’m glad it was Margaret that called in for a visit while I was harvesting potatoes the other day... In spring I had encouraged my partner to plant something he loved to eat so he would spend more time in the garden. We had selected the perfect site - leaving some compost in the winter compost heap and adding a pot pourris of manure. Real seed potatoes were purchased and all were hand watered and lovingly tended and watched over.

Judgment day: after much digging, a very small basketful was all we could find. To admit this was our complete crop (we had also dug some rogue Kiplers that had grown by themselves) made me feel a complete failure. Margaret was sympathetic - hers had grown well this year.

Gardens can be like that though. The more I garden, the less attached to results I get. If something proves hard to grow, after several tries I try something else. It seems we all have vegetables we have an affinity with, that do well for us. Often, those same plants won’t grow next door in the same soil and conditions for our neighbours.

We have this idea that we have control over our patches of dirt. The reality is that nature calls the shots. The idea of failure never occurs in its cycles. It is us human beings that get upset when things don’t work out as we have planned. As I get older I am less goal-orientated and enjoy the act of creation for its own sake whether it is gardening, knitting or writing. While I’m curious to know why things happen as they do, I no longer take it as a personal failing if what I end up with is not perfect in my own very critical estimation.

There is magic in the unexpected and the different if we can look with the eyes of a child. If we need potatoes, we’ll ask Margaret!