Showing posts with label gluten free. Show all posts

Wednesday, February 21, 2018

Who said you can't?

By late summer, many gardeners run screaming at the sight of yet another zucchini lurking in the garden. The delightful finger long babies guiltily picked at Christmas are long forgotten as more sneak their way into the chook bucket. Every year I seem to come across a new zucchini tip and here I have one new one that dispels the myth about freezing zucs, a dehydrator recipe and a Kofta recipe that is a beauty.


ZUCCHINI SPAGHETTI
grated and blanched
Spiralise your zucchini.
Blanch by pouring over boiling water then refresh with cold water.
Allow to drain.
Pack into a box or sealed bag and freeze.
Defrost in a sieve or colander to allow excess moisture to drain.
Use in your favourite recipe.
It does not need cooking, warm through if you like.
I cooked some mushrooms, melted in a block of frozen pesto and stirred through the zucchini with some pitted olives...divine!
It has a certain chewiness of texture reminiscent of al dente pasta.
One 20cm zuc will feed two people.


This is an old favourite that I am happy to repeat:

ZUCCHINI CHIPS


Slice evenly, sprinkle with salt and allow to degorge.
Pat dry, sprinkle with pepper and salt.
Dehydrate till leathery.
Flip slices and continue to dry till crispy.
Store in an airtight container.
Serve as a snack or with dips.
Use as a gluten free 'pasta' layer in lasagne
NO fat and virtually no calories!
One 20cm zucchini makes two trays/one coffee jar.


ZUCCHINI KOFTA
A recipe for the cook who shared the spaghetti secret with me!
Serves 4 with rice and is gluten free. For a vegan option replace dairy with coconut milk

Koftas

500g grated zucchini, salted and squeezed, save liquid.

1 green chilli, chopped fine
1 large onion, chopped fine
1/2tsp grated ginger
2Tbsp fresh coriander, chopped
2Tbsp chickpea flour

Mix all well and form into 16 balls.
Fry quickly till brown or brush with oil and bake at 180 degrees.

Sauce
2 onions, chopped fine
rice bran oil
Heat oil and fry till transparent

1/2 tsp turmeric
pinch cayenne pepper
2 tsp ground coriander
Add and cook for a minute or so, till fragrant

225g canned or fresh tomatoes, chopped
zuc water from above
Add to onions and spice, simmer until reduced in volume by half.

250ml cream or yoghurt
1/2 tsp garam masala
Gently warm through, pour over koftas and sprinkle with whole roasted cumin seed or fresh coriander.

I hope you all enjoy the last of the season - in the middle of winter!


Wednesday, June 15, 2011

Picking pomegranates with a pin

During the summer holidays when I was a child, pomegranates from Israel would appear in our local greengrocers. Until then, grapes were the most exotic fruit I had eaten and they, being expensive, were reserved for hospital visits. I would happily spend a week’s pocket money on one of these delicious red balls and assisted with a safety pin, would extract its glistening jewels of seeds to eat one by one.
I have an ongoing love affair with the pomegranate tree. I love its rich orange flowers, the colour of smoked salmon, its slightly scruffy habit and the fact that it never seems to know whether it is deciduous or not and the fact its seed sparkles like the most expensive jewels. I have a miniature pomegranate in a pot that produces fruit the size of a plum so must rely on friends for my supply.
Here, pomegranates ripen in late autumn/early winter arriving with the apples and mandarins. Six beautiful fruit came my way this week and I was determined not to waste them. The ‘boys’ are meeting for a barbeque tonight so I used this as an excuse to bake a cheesecake and make a pomegranate syrup topping. I made the base gluten free with ground pecans, Arnott’s Rice Biscuits and some added rice crumbs.
Here’s the recipe, it makes about a cupful:

Pomegranate Syrup

3 ripe pomegranates
Juice of one lemon
Honey or sugar

Roll two of the pomegranates on your bench till they are softened.
Cut in half around their ‘equator’ and juice with a citrus juicer.
Place the juice in a small saucepan with one tablespoon of water and the lemon juice.
Drop in a good slurp of honey (I used about 3 tablespoons) or the equivalent of sugar.
Do not use a strong flavoured honey (like I did!) as it will over power the flavour of the pomegranates.
Bring to the boil over a high heat and then simmer until thickened.
While this is happening, trim off the flower end of your last fruit. This is the spiky little cup opposite to the stem.
Cut the fruit into four segments. For perfect seeds, only cut through the skin layer and then peel it back.
With the segments in a bowl, gently rub the red seeds away from the yellow pith.
Make sure all pith is removed as it can be very bitter.
Drain in a sieve until needed.
When the syrup has reduced and become thicker, stir in the seeds, reserving a few for garnish.
Allow the syrup to cool before serving.

Use over cheese cake, ice cream or pancakes.
For more on these amazing fruits see: http://www.nirala-naturally.com/pomegranate.html

Monday, March 28, 2011

Sweet potato what?


I had a present from the big smoke recently. Amita, at the Chinese shop, found these gluten free noodles made from sweet potatoes. They were bright green in the packet and had a vaguely unpleasant earthy smell to them. The way the delightful green faded away reminded me of the way that purple beans turn disappointingly green during cooking and made me suspect it was a natural colour. After I boiled them as I would pasta, the texture was very much like cellophane noodles although not as bland and looking like a fat spaghetti.

 We ate them in a black bean and tofu vegetable stir fry we both enjoyed.  

Saturday, March 12, 2011

Talking to bread

After two weeks, I was heartily sick of eating fluffy gluten free bread. Since my first attempts at sour dough I have been an addict at breakfast time especially. As I was unable to find a recipe for gluten free sour dough anywhere so my first attempt was unaided. I was really pleased with the results so I will share them with you.
You will need to make/borrow/beg a sour dough starter. I used my rye starter which I had removed from the fridge and 'fed' the day before starting.
Bread making is an art rather than a science, so don't worry too much about times or weights and measures. The process of sourdough cannot be hurried. It will however, proceed quite happily without much intervention on your part. It is easiest to start 24 hours before you want to bake. I begin the 'sponge' after dinner, knead the bread after breakfast then bake while cooking dinner the next day.
Don't be put off by the length of this recipe, I have tried to explain the processes for bread beginners. If you have made bread before, you can skip a lot of it.

You will need:
2 C room temperature water
1 C of 'refreshed' sour dough starter 
75g ground linseed
½ C sunflower seed
1 ½ tsp salt

0 hour: Making the sponge (nothing to do with cake)
Mix the wet ingredients in a bowl.
Add 3C of flour and all other ingredients except the salt in a large mixing bowl.
Mix to a thick batter.
Place in a plastic bag and cover with a cloth. Do not seal the bag, you need to let the dough breathe but you don't want a crust forming. Sit in a draught free place.
8-12 hours: Kneading and shaping.
The batter will have risen slightly in the centre and have a sponge like appearance when the surface is disturbed. This means that the natural yeasts and bacteria in the sourdough have been activated and are producing bubbles of carbon dioxide.
Oil a loaf tin.
Stir the salt into the sponge. This is important to stop the work of the bacteria that inhibit the natural yeasts that aerate the dough.
Sprinkle some of the remaining 2 C of flour onto your bench and scrape the sponge onto it.
Flour your hands and begin to work the extra flour into the dough by pulling a little dough from the edge that sits at 12 on the clock with your fingers and pushing it back into the centre firmly with the heel of your hand.
Swivel the dough ¼ turn and repeat, adding extra flour to the bench as you need to until it it possible to form it into a loaf shape. Continue until the flour is used up. You can add a little more if you need to as all flours vary in moisture content.

The dough will remain heavy and sticky but should be dry enough that your hand doesn't stick to it. The texture is not crucial, gluten free dough's are always 'wetter' than those made with high gluten flour
At this stage, bread dough's are tested by pushing a finger into the dough to form an indent. If it springs back, the gluten has been activated and you can stop kneading. I tried this with the gluten free loaf and after a lot of kneading it did spring back slightly.

Shape into a rough loaf, place in the oiled tin and press dough down to an even thickness.
Return the tin to your plastic bag and cover again. Leave to rise (or proof.)
12-24  hours: Baking
Preheat you oven to 200˚.
Your loaf should have now doubled in size. If it hasn't, leave it a little longer.
Bake for 35 - 40 minutes or until the bottom of the loaf sounds hollow when you tap it.
Cool on a rack, covered by a cloth.
Sourdough keeps really well without refrigeration. It is better toasted if you keep it in the refrigerator or freezer. If you want to eat it fresh, keep it in a cool place.

If you have made bread before you will find this dough is very different from bread with gluten. The results were very pleasing - even bubbles, a firm texture, not soggy and slicing well with a lovely sour dough aroma and it is still looking good after 6 days! Don't be discouraged if your first result is not perfect. Remember that the dough is a living being. It needs food, water, warmth, moisture and care, to rest undisturbed and responds to being talked to.

Enjoy!

Wednesday, March 2, 2011

Gluten free quest

I love bread... homemade dark rye sourdough with grains and seeds is my weakness...and something I can no longer eat.....
Most commercially available gluten free breads are raised with baking powder and have a very cake like texture. If they include wholemeal flour or grains, they have to be boosted with other raising agents to give extra rising power in heavier dough.
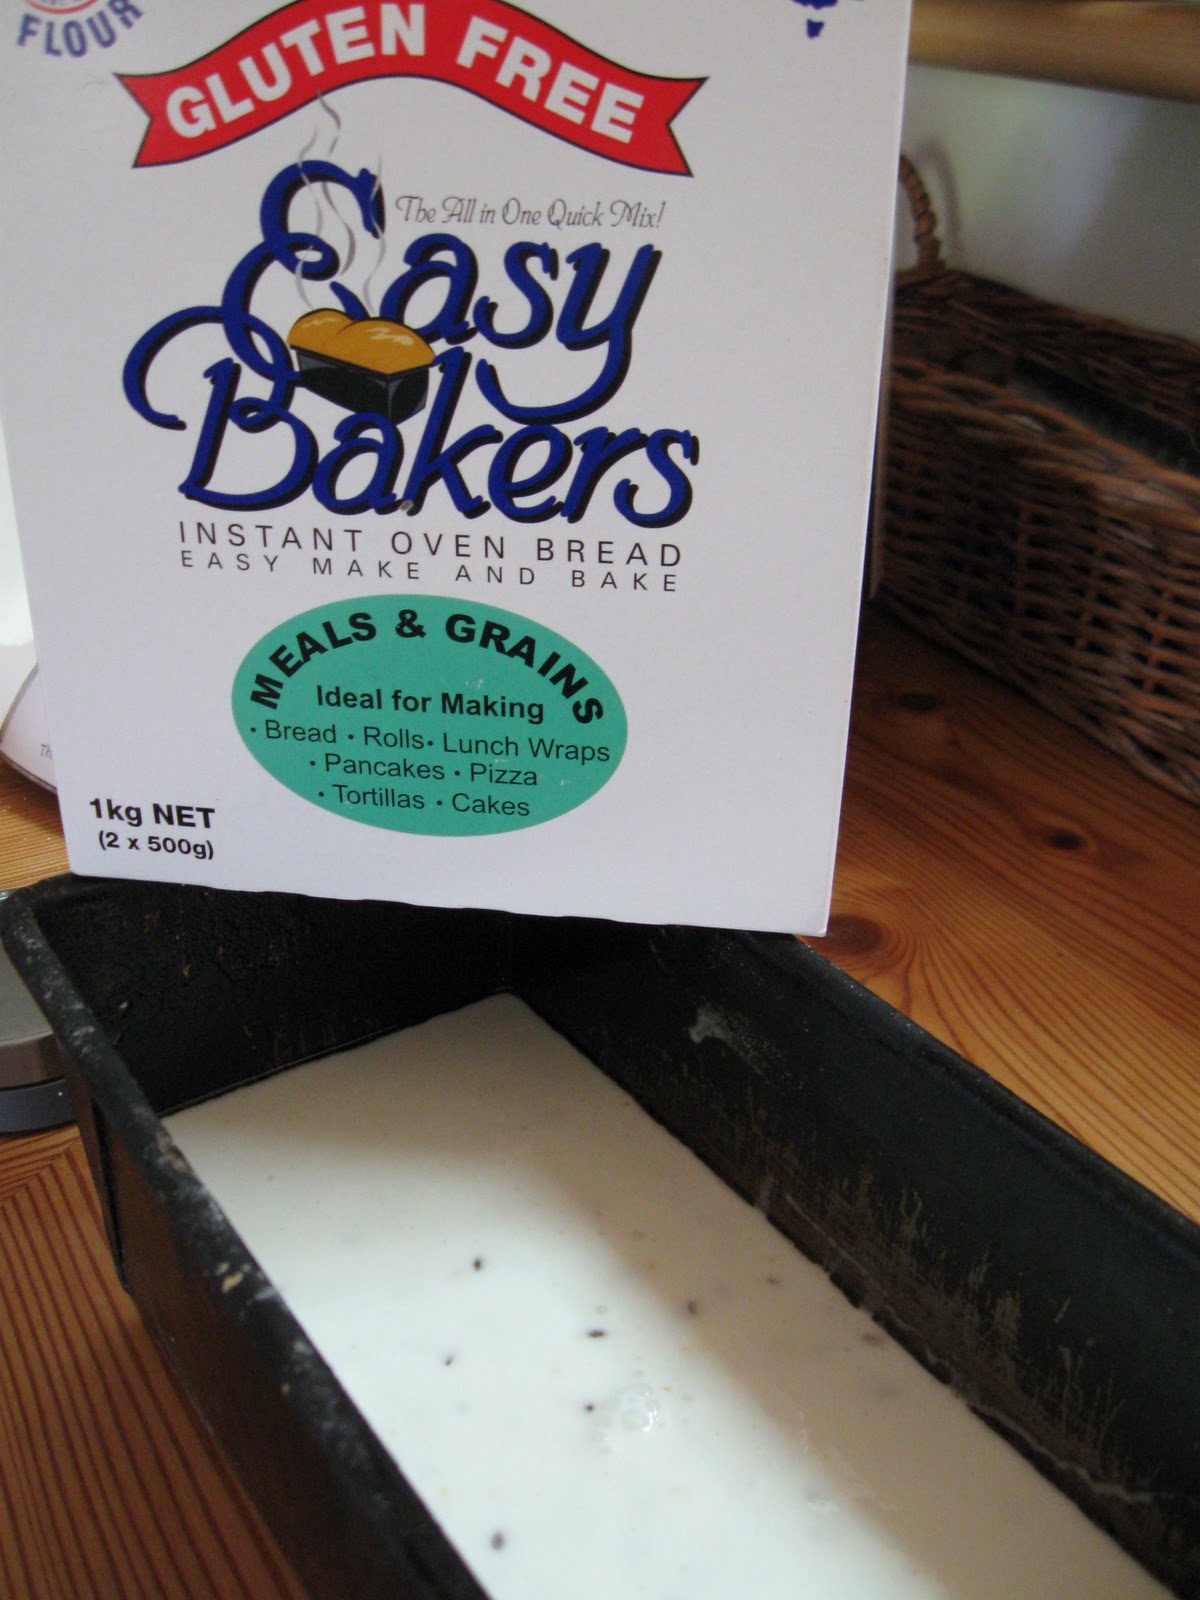
I had picked up a packet of what I thought was Laucke gluten free flour in anticipation of experimenting and it turned out to be a bread mix that only took an hour to make. As I had to have the oven on to bake for the markets and the kitchen was already hot, it made sense to fill the oven. This mix contains bicarbonate of soda (E500), glucono delta lactone (E575), which is either synthetic, or produced by bacteria from sugar. Guar gum (E412) and Xanthan gum (E415) are both natural thickeners and E464 – hydroxypropylmethylcellulose, is a semi synthetic thickening agent derived from wood and may cause digestive problems in sensitive people.
The mix was easy to prepare, I mixed 500gm and water in Thermomix on soft for 30 seconds, then #3 for two minutes. Interestingly, the batter is then left to rise for 20 minutes. It almost doubles in size, I can’t quite figure out why – there must be some reaction between the two rising agents. The 500g bag, which is half the amount in the box, made a large loaf in my 2 litre capacity tin. It browned a little unevenly and sank a little after cooking but this was probably because I had the oven set 5 degrees higher than recommended and didn’t notice so it cooked too fast. The only problem I had was removing it from the tin. I had oiled it really well, as recommended but it stuck in places. I will always line the tins for these batter type mixes in future.
The results were okay, a nice soft loaf that sliced well after cooling. The results were still a bit ‘white’ for my taste, but preferable to the frozen and defrosted GF bread available for sale here and as it costs half as much, is worth considering. The same mix can be used for rolls, pizzas, tortillas, cakes and pancakes, all the recipes are on the packet.
I froze half the loaf, defrosted, it was 'fresh' enough for sandwiches and toasted very nicely.
No luck so far in the hunt for gluten free sourdough recipes but have come across a huge list of GF grains I can play with and some recipes for making your own GF flour blends.

PS. Balingup Bronze Cafe is holding gluten free cooking classes here soon.